

*Flannel Board Sets for Preschool Teachers and Storytime Librarians*

Making Letters With "Stuff"
This is a fun small
group activity to do when the kids are showing interest in letters. We give them various lengths of string;
small, medium and larger sticks; and bring out some printed letters to give them
some guidance. This is so fun, and a
great way for them to see how curves and straight lines can be made.


Dramatic Play With Chairs!
The
simplest things provide such complex play experiences! Simply lining up a few chairs is an
invitation to play that will lead to all sorts of amazing dramatic play
activities. Watch as the kids pretend to
go on car trips, bus or train trips, airplane adventures, on safaris or to outer space, etc.


Super Hero Love :)
Super Hero story time coming up? Here are some cuties to go along with it. This set was inspired by Miss Meg at Miss Meg's Storytime.
Leah at Sunflower Storytime has a slew of super hero ideas right here!

Check out the Flannel Friday Facebook Group and Pinterest Boards!
Using Ramps at Small Group time
Science and math happen all the time during play, but sometimes its fun (or necessary for assessment reasons) to set up an activity and take the time to make note of what the kids know and understand. Ramps are a great option for this, because they are fun, easily accessible, and kids love them!
When I planned with my co-teachers for small group activities, there were two main goals: 1. We wanted the kids to have fun and 2. We wanted the activity to allow us to easily gather the info we needed for whatever assessment we were focusing on. For this activity, our assessment goals were to see whether the children used and understood distance, position and comparison words like close, far, near, farther, closer, higher, lower, faster, slower, etc.
So all we need for this activity are ramps (we had flat boards and some double unit blocks that we used) various things to prop them on at varying heights, balls and other small toys that do and don't roll, a roll of masking tape, and a pen.

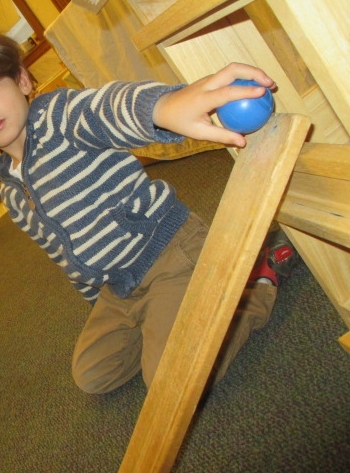


We'd break the kids up into pairs (this is a great time to pair up kids who might not normally choose to work together, just to expand their horizons!) and give them all of the materials (other than the pen, which you'll be using). We'd give them a little prep or a challenge, like "Can you guys see which of your toys can roll or slide down your ramp the fastest?" And off they go!
As they work together, using tape to mark where their toys land, you can write the names of the items on those pieces of tape, and encourage them to try things in different ways. "What if you make your ramp lower? Does that make the ball roll faster or slower? Does the block go far from the ramp, or stay close? How can you make your toys move more quickly? Why can't things roll UP the ramp?" Have a notepad or clipboard all set up ahead of time with the kids' names already printed, and jot down notes about what they do and say to transfer to your assessment tool later. You can even use the marked pieces of tape to make a graph with the kids, noting which things traveled farthest from the ramp...
Making Beads
Here's a nice little activity that extends over several days, builds lots of skills (such as fine motor, creativity, and cause and effect!) and is just plain fun :)
We used the awesome book Mudworks by Mary Ann Kohl to create a batch of dough for making beads...

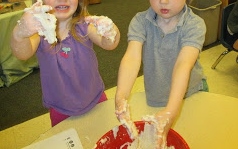
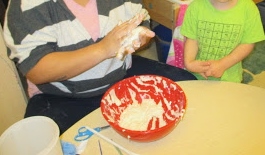
Once our dough was just right, we rolled it into various small shapes.


We poked holes into the dough shapes with the ends of thin paintbrushes:

We had to wait several days for the dough beads to dry, but when they were finally ready, we painted them. Then, when the paint was dry we strung our beads onto string and made bracelets and necklaces!


Want preschool ideas, shop updates and more?

Fine Motor Activity: Plant a Flower!
I had been using flannel boards in my classroom to share stories, songs and games for quite a while before I started making actual felt sets for the kids to use. For some reason with the sets I made for the kids, I had limited myself to scanning my story sets, printing them out on card stock, laminating them, and attaching Velcro.
I guess it was probably quicker and easier that way--but those sets were quite limited in that the pieces couldn't be layered, and the kids didn't get to experience the feel of felt, or the problem solving that happens when felt snags slightly on a dry finger, or needs to be pressed a little more firmly to stay on the board...

But finally I realized the error of my ways, and began to make what I call DIY sets for the kids. These sets are kind of amazing in all the skills they enhance--and all simply through play!
Math skills like color sorting, shape naming, counting, one to one correspondence...
Early literacy skills like vocabulary building and labeling happen naturally--and I include a list of awesome books to read as well as several rhymes and songs to use with the kids.
Fine motor skills grow of course, as they pinch and grasp and place/remove/replace the pieces.
And then there's creativity and imagination, as children decide whether to decorate a butterfly's wings with circles or tear drop shapes; to put 1 or 10 leaves on a flower stem; to turn a lady bug into the center of a flower...
The ideas they come up with always make me realize just how limited my own imagination has become!


Do you use felt sets in the classroom, beyond the circle time stories and games you might have? If not, I encourage it! If you're crafty, felt is inexpensive and you can create all kinds of sets around a zillion different topics.
If you're not crafty, come buy some from me ;)
Two Art-Area-Organizing Ideas
If you're a preschool teacher, you're probably on a bit of a budget. Even if not, it's always nice to find ways to recycle! These two simple tips will help keep your art area just that little bit more organized; will provide simple ways for the children to help at clean up time; and can even build a few math skills at the same time! Here they are, easy as pie:
Organizing your crayons has never been so simple. Collect and clean out empty food cans--all the same size works best (for those of us with a few OCD tendencies, at least!), and I prefer them short enough so the tips of the crayons can be seen sticking out of the tops. You'll want the number of cans to be equal to the number of colors in your collection. Simply cut colored construction paper to wrap around the cans, gluing or taping them neatly on. Cover that paper with Con-tact paper or clear packing tape, and voila! Store your cans in a shallow tray or basket, and you've got a nice organized crayon storage method. Kids can easily transport the whole tray or individual cans to the art table, find the color they're looking for, and can get a little practice in math and color recognition at clean up time :)

Next up: paper storage! How many random baskets and tubs of papers do you have making an eyesore of your art area?! (I admit that even with this one in use, I still kept other messier baskets on the shelves as well, to provide a larger variety of types and sizes of paper...) But this is such a perfect paper holder, and fits so nicely on a preschool classroom art shelf, and lets the kids be so self-sufficient and independent, that I consider it a must have.
The box you see pictured below is the storage box from a class pack of markers. My school always got ours from Discount School Supply (here's a link). Now if you don't already buy these class packs, you're not going to want to order a set for $90 just to have this paper storage solution! But if your school already buys them this way, all you have to do is take off the lid, cut your papers to fit, and you're set! Just as with the crayon cans, this lets the kids be independent, helps them sort and organize naturally, and is a big help at clean up time. Mine lasted at least five years, and my school went through boxes and boxes of markers each year, so this was a no-brainer :) You can even cover the bottom of each section with its own color of paper if you really want to help with the whole color sorting idea...

Do you use these or other similar tools to keep your art supplies organized? Leave your comments below!
Problem Solving in the Classroom
I always used a problem-solving approach in my classroom. It takes a lot of work at first, but the results are amazing, the children benefit so much from it, and you'll have children as young as two negotiating for the use of toys in no time! Here's an example of a letter I sent out to the families explaining this method:
How about you? Do you use a similar method in your classroom? Do you love it like I do? Comment below :)
Dear families,
As the school year is right around the corner, we wanted to give you a little bit of information about part of our classroom philosophy. We use a child-centered, problem solving approach to
discipline and guidance in our classroom.
Below is a description of some of the main aspects of this
approach.
*We realize the importance of active
listening. During conflicts (and at all
times), children are listened to. We repeat children’s words in order to
reinforce and validate them, and all feelings are accepted and explored. We also provide words for those children who
are pre-verbal or who struggle to communicate.
Example:
"Okay, Rosie, it looks like you guys are having a problem with this toy. Tell me what's going on..." "Margaret, now tell me how you're feeling." "Okay, it sounds like you both want to have a turn with this small doll, and you're both feeling pretty frustrated. Let's figure this out..."
Example:
"Okay, Rosie, it looks like you guys are having a problem with this toy. Tell me what's going on..." "Margaret, now tell me how you're feeling." "Okay, it sounds like you both want to have a turn with this small doll, and you're both feeling pretty frustrated. Let's figure this out..."
*Because we respect children’s choices and need
for time and space, we don't expect or force children to share toys; instead we
encourage communication, negotiation, and taking turns.
Example:
"So how can we solve this? You both want a turn with this doll. What would make you happy, Rosie? Okay, Rosie's idea is for her to have a turn and then Margaret. Is that okay with you Margaret?" (continue until they come up with a solution, and offer solutions to them if they are stuck.)
Example:
"So how can we solve this? You both want a turn with this doll. What would make you happy, Rosie? Okay, Rosie's idea is for her to have a turn and then Margaret. Is that okay with you Margaret?" (continue until they come up with a solution, and offer solutions to them if they are stuck.)
*We don't solve children’s problems for them;
rather, teachers facilitate children’s negotiations, encouraging children’s
active participation in their own conflict resolution.
Example: We don't say "Well, I saw Margaret with it first, so she gets the first turn." That's the easy way, but it doesn't help them come up with their own solutions.
Example: We don't say "Well, I saw Margaret with it first, so she gets the first turn." That's the easy way, but it doesn't help them come up with their own solutions.
*Knowing that children need repetition and to work at their own pace, we don't set time limits on the use of toys.
Example: "Alice, I can tell you want a turn with that truck. Yes, I know Harry has had it for a long time. Do you want to ask him how many more minutes he's going to be?" We then help the children negotiate on a time that's okay with both of them. Though they don't really have a concept of time, just giving them control over being able to contribute to the solution usually solves the problem!
Example: "Alice, I can tell you want a turn with that truck. Yes, I know Harry has had it for a long time. Do you want to ask him how many more minutes he's going to be?" We then help the children negotiate on a time that's okay with both of them. Though they don't really have a concept of time, just giving them control over being able to contribute to the solution usually solves the problem!
*We don't expect children to apologize or express
any other emotion they do not genuinely feel.
We do model sympathy and empathy as we facilitate a conflict resolution.
Example: "Oh no! Sammy, that hurt, didn't it?! Ouch! You can tell Jane she can't hit you with that block!" "Jane, Sammy is telling you that's NOT okay!" "Are you okay Sammy? I'm sorry you got hurt!" No lectures here. Jane knows she was in the wrong, and giving her a lot of attention about it can backfire and encourage more of the same. We give more attention to Sammy so if Jane is lashing out for attention, she's not getting it. We've found that having children say they're sorry when they actually aren't helps no one. When they genuinely feel sorry and express that, we welcome it!
Example: "Oh no! Sammy, that hurt, didn't it?! Ouch! You can tell Jane she can't hit you with that block!" "Jane, Sammy is telling you that's NOT okay!" "Are you okay Sammy? I'm sorry you got hurt!" No lectures here. Jane knows she was in the wrong, and giving her a lot of attention about it can backfire and encourage more of the same. We give more attention to Sammy so if Jane is lashing out for attention, she's not getting it. We've found that having children say they're sorry when they actually aren't helps no one. When they genuinely feel sorry and express that, we welcome it!
*We remember that although something may not seem
fair to us, we do not ultimately determine the outcome of conflicts between
children. We are here to help the
children determine their own solutions.
Example: "I can tell you both want to use this amazing puzzle. Gloria is asking you how many minutes you're going to be, Frank... 20 minutes? Is that okay with you Gloria? Yes? Okay, I'll tell you both when 20 minutes are up." Even though 20 seems awfully long to us, that's what they decided on. In the meantime, Frank will probably finish in two, and when we see that, we'll remind him to let Gloria know that it's her turn. Since she was able to negotiate, she's probably forgotten all about it anyway, and has moved on to play with something else! (Be sure you follow through if Frank really does keep playing with it that long. They both need to know we're reliable and that they will be held accountable for their decisions!)
Example: "I can tell you both want to use this amazing puzzle. Gloria is asking you how many minutes you're going to be, Frank... 20 minutes? Is that okay with you Gloria? Yes? Okay, I'll tell you both when 20 minutes are up." Even though 20 seems awfully long to us, that's what they decided on. In the meantime, Frank will probably finish in two, and when we see that, we'll remind him to let Gloria know that it's her turn. Since she was able to negotiate, she's probably forgotten all about it anyway, and has moved on to play with something else! (Be sure you follow through if Frank really does keep playing with it that long. They both need to know we're reliable and that they will be held accountable for their decisions!)
By using these methods, children acquire important problem
solving skills. They begin to rely upon
themselves to figure a problem out, which builds their self-esteem,
self-confidence and sense of control.
If you have any questions about this method of guidance, please let us know. We are passionate about this way of supporting children as they learn to work and play in a classroom setting, and we look forward to sharing and exchanging ideas with you throughout the year!

How about you? Do you use a similar method in your classroom? Do you love it like I do? Comment below :)
Play dough--the details!
Soft and squishy, bright and colorful--what's not to love about play dough? Upon entering my classroom, it was one of the first things the children were greeted with each day, and was one of the most popular spots in the room.

As I mentioned in another post on play dough, I changed the color of the dough every two weeks, and swapped out a selection of open-ended gadgets and gizmos at the same time. By that time the dough was becoming a bit too crumbly, the toys needed a good soak and scrub, and the scent I'd added had probably faded quite a lot.
So what about those colors and scents? When I first started out as a teacher, I was lucky enough to get the best recipe ever for play dough from a co-teacher. I used the same recipe for 25 years (sometimes I'd make a double batch and freeze half to use at another time--it freezes perfectly!) But it wasn't until I'd been teaching for a few years that I discovered the joys of Liquid Water Color (beautiful, vibrant colors that you just can't get with food coloring), and the added sensory benefits of scenting the dough.
So here's everything I know and love about a good batch of play dough--enjoy!
The Only Play Dough Recipe You'll Ever Need
With a whisk or spoon, stir the following together in a medium pot:
2 cups all purpose flour
1/2 cup salt
2 Tbs. cream of tartar
Add and stir with a whisk or spoon:
2 cups water
2 Tbs. vegetable oil
As much liquid water color as you need to get the desired color
Whatever scent you've chosen (Some ideas are listed below)
Once you've whisked/stirred until there are no more lumps (a minute or two), turn the heat on to medium high. Stir with a wooden spoon constantly, until the dough begins to form a ball (a few minutes). It can still be a bit wet and mushy in spots when you dump it out of the pot onto the counter. Let it cool for a few minutes, and fill that pot with water right away for easier cleaning! Once the dough is cool enough to handle, knead it/mush it all together, combining any wettish spots with the more cooked parts. Soon you'll have a gorgeous lump of brightly colored, beautifully scented dough. You can store it in any airtight container (I usually used a zip top bag or Tupperware-type container.)
Smells and COLORS!
(Make sure there aren't any allergies or sensitivities in your class before you add scents to your dough)
Extracts--from the baking aisle in the grocery store--these go on sale periodically, so stock up!
Peppermint (great with red, green, pink or uncolored dough)
Lemon (yellow--or purple!)
Vanilla (uncolored, brown, black, blue--any color, really!)
Coconut (yellow, tan, turquoise--think beachy colors...)
Almond (uncolored, brown)
Lime (green!)
Orange (orange!)
Kool Aid
You can use Kool Aid to color and scent your dough--but it makes it a little sticky, and in humid weather it can go bad (aka moldy!) quickly, so beware!
Spices
Cinnamon (I love this with red or brown dough)
Pumpkin Spice (orange or brown...at Thanksgiving)
Italian Seasoning (uncolored, so you can see all the flecks!)
Cocoa Powder
I love to use this to make chocolate scented dough, and it adds a lovely smoothness to the dough, too. Throw several tablespoons in with the other dry ingredients. Add lots of black and brown food coloring for a deep chocolate look...
Hopefully you love play dough as much as I do, and use it daily in your classroom. And if not, you've got no excuses now! Get going!

Do you have a favorite recipe? A color and scent combo you couldn't live without? Post in the comments below!

As I mentioned in another post on play dough, I changed the color of the dough every two weeks, and swapped out a selection of open-ended gadgets and gizmos at the same time. By that time the dough was becoming a bit too crumbly, the toys needed a good soak and scrub, and the scent I'd added had probably faded quite a lot.
So what about those colors and scents? When I first started out as a teacher, I was lucky enough to get the best recipe ever for play dough from a co-teacher. I used the same recipe for 25 years (sometimes I'd make a double batch and freeze half to use at another time--it freezes perfectly!) But it wasn't until I'd been teaching for a few years that I discovered the joys of Liquid Water Color (beautiful, vibrant colors that you just can't get with food coloring), and the added sensory benefits of scenting the dough.
So here's everything I know and love about a good batch of play dough--enjoy!
The Only Play Dough Recipe You'll Ever Need
With a whisk or spoon, stir the following together in a medium pot:
2 cups all purpose flour
1/2 cup salt
2 Tbs. cream of tartar
Add and stir with a whisk or spoon:
2 cups water
2 Tbs. vegetable oil
As much liquid water color as you need to get the desired color
Whatever scent you've chosen (Some ideas are listed below)
Once you've whisked/stirred until there are no more lumps (a minute or two), turn the heat on to medium high. Stir with a wooden spoon constantly, until the dough begins to form a ball (a few minutes). It can still be a bit wet and mushy in spots when you dump it out of the pot onto the counter. Let it cool for a few minutes, and fill that pot with water right away for easier cleaning! Once the dough is cool enough to handle, knead it/mush it all together, combining any wettish spots with the more cooked parts. Soon you'll have a gorgeous lump of brightly colored, beautifully scented dough. You can store it in any airtight container (I usually used a zip top bag or Tupperware-type container.)
Smells and COLORS!
(Make sure there aren't any allergies or sensitivities in your class before you add scents to your dough)
Extracts--from the baking aisle in the grocery store--these go on sale periodically, so stock up!
Peppermint (great with red, green, pink or uncolored dough)
Lemon (yellow--or purple!)
Vanilla (uncolored, brown, black, blue--any color, really!)
Coconut (yellow, tan, turquoise--think beachy colors...)
Almond (uncolored, brown)
Lime (green!)
Orange (orange!)
Kool Aid
You can use Kool Aid to color and scent your dough--but it makes it a little sticky, and in humid weather it can go bad (aka moldy!) quickly, so beware!
Spices
Cinnamon (I love this with red or brown dough)
Pumpkin Spice (orange or brown...at Thanksgiving)
Italian Seasoning (uncolored, so you can see all the flecks!)
Cocoa Powder
I love to use this to make chocolate scented dough, and it adds a lovely smoothness to the dough, too. Throw several tablespoons in with the other dry ingredients. Add lots of black and brown food coloring for a deep chocolate look...
Hopefully you love play dough as much as I do, and use it daily in your classroom. And if not, you've got no excuses now! Get going!
Do you have a favorite recipe? A color and scent combo you couldn't live without? Post in the comments below!
Subscribe to:
Posts (Atom)